Canada Rocc – Part 3 – Scirocco Upholstery Repair
 When Canada Rocc arrived at WCR North, we knew we were about to perform a Scirocco Upholstery Repair. The seats were ripped on the drivers bolster, the seat back was broken and the lever for moving the seat back was not functional. Unfortunately I did not get too many photos of every process, but you’ll get the idea.
Structure Scirocco Upholstery Repair
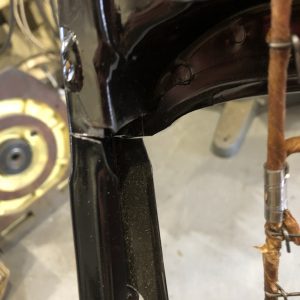
For our first Scirocco Upholstery Repair, we pulled the seat out of this fine lady. We removed the 4 hog clips on the bottom and removed part of the upholstery from the back. Next, we removed the headrest. Headrests are a pain in the ass to remove with the upholstery on. Once that part is accessible, it makes it much easier to pull the clips from the inside. Luckily the break was just a straight line that broke. So, we cleaned the area, clamped and welded it back together. A little clean up, primer and paint finished that off.
Vinyl Scirocco Upholstery Repair
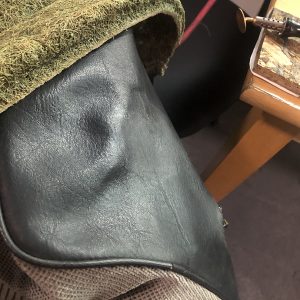
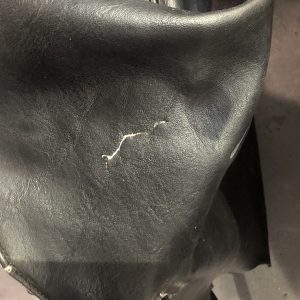 In the same area of the upholstery, the metal had ripped the vinyl. While the seat cover was was off we began repairing the black vinyl. We used Permatex ‘ULTRA’ Vinyl & Leather repair kit. You just need to follow the instructions, it’s very straight forward. There are also some YouTube videos on how to do it. We made sure not to over heat the area and put multiple thin layers of the vinyl repair compound in conjunction with the texture sheet that was provided. As you can see from the before and after photos, You can barely even tell it was damaged. Take your time while doing this. Plan for a 1-2 hours to this repair.
-
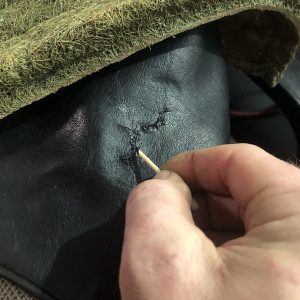
- Applying compound.
-

- Heating with tool and texture.
-

- First application complete.
-
- Fourth layer, shifting the pattern around blends it all together.
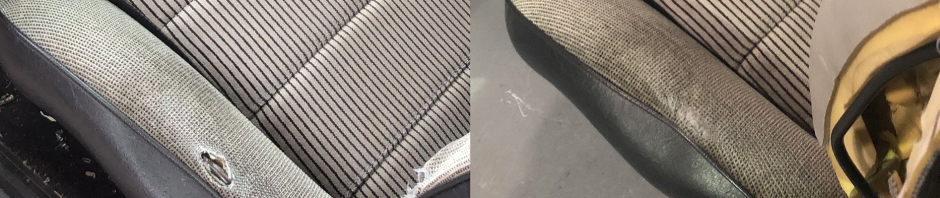
Fabric Scirocco Upholstery Repair
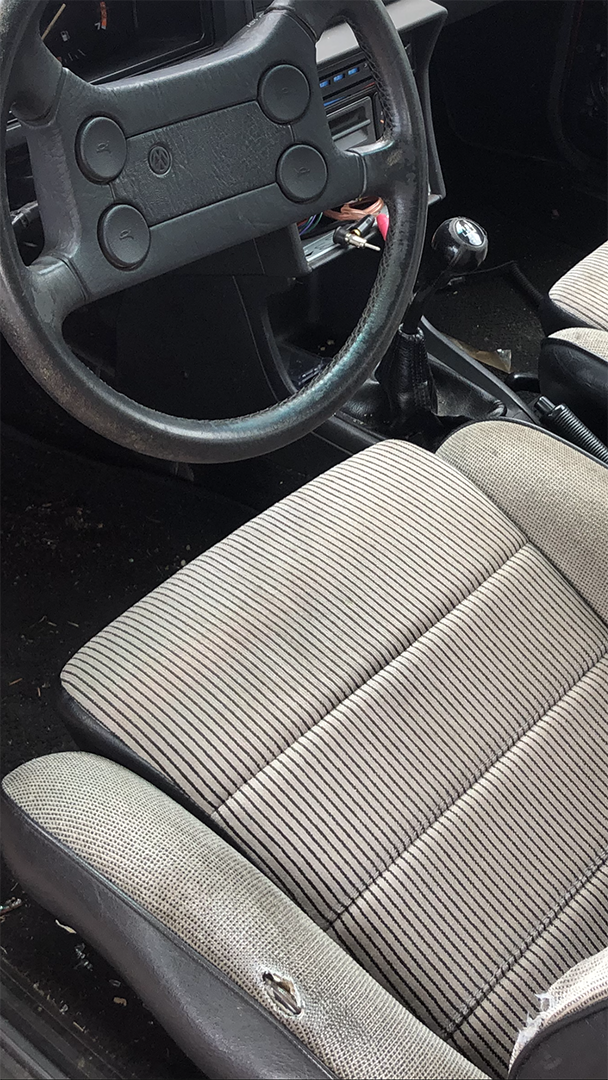 While that seat back was off, we also repaired the bolster tear. We did not remove the upholstery. We just tucked some upholstery padding in that area and layered that over the the metal frame. It took a little work to make it look even. We pulled it out 4-5 times to trim the padding to make it look even. After that, we use a upholstery thread and curved upholstery needle to stitch it back together.
To cover the stitching, we used the Permatex Fabric Repair kit. This kit has flocking material to match the color of the upholstery. We mixed the flock to the color of the upholstery. Then, using the glue with the kit, applied just enough to that area to cover the stitching. Finally, we loaded the flock into a mini air blower and used that as a flocking tool. Shake it up and blow the flock onto the glue.
The kit comes with a screen, but it’s total BS and doesn’t work. Once it dried, we used a fine point Sharpie pen to recreate the dots that were in the upholstery pattern. The color wasn’t 100% perfect, but for this repair it was better than the giant tear from before.
More Info
If you have any questions about Scirocco Upholstery Repair, feel free to contact us and we’ll help as much as we can.